Windows - How to do Windows enrollment using .exe file for WeGuard.
Hello and Welcome to WeGuard Enterprise Visual Knowledge-base Series.
In this KB article, We will explain how to do Windows enrollment using the .exe file.
 Note: WeGuard supports Windows 10 & higher laptops & desktops (IoT devices) with Professional (Pro), Enterprise, Business, and Education editions.
- On the top right bar, click on the ‘cog wheel’ icon and then click on ‘Settings’ as shown below.
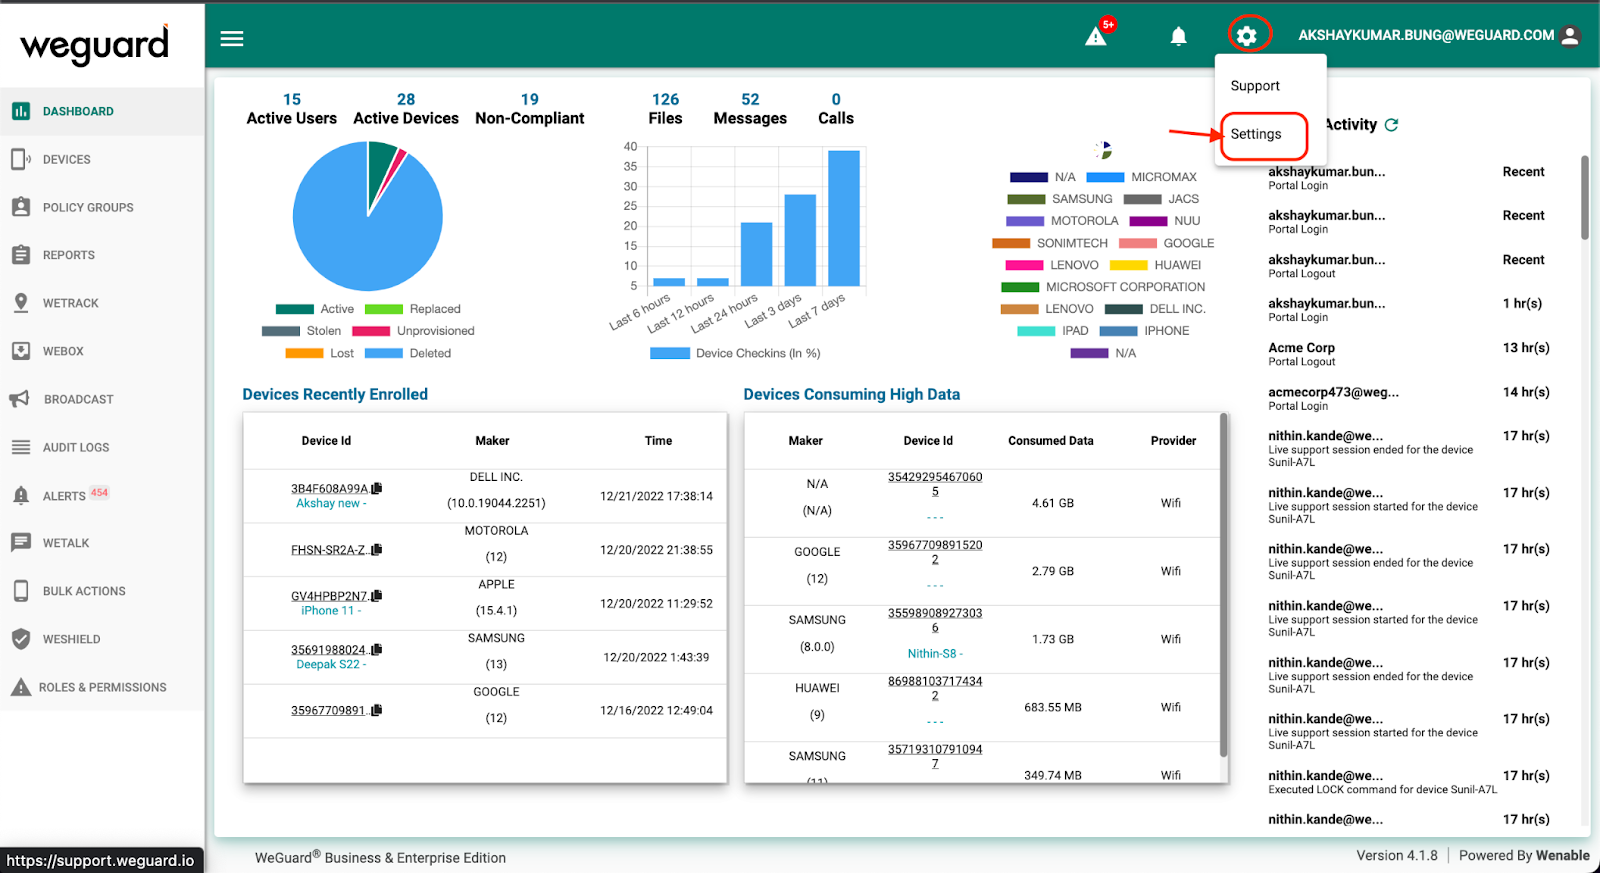
- On the next screen, you need to click on ‘Windows Enrollment’ as shown below.

- Now you shall see the Bulk enrollment section, click on ‘Choose your preference’ dropdown and select .exe file and then hit ‘Download’.

- After the .exe file is downloaded, you need to send the file to the target windows devices where you want WeGuard to be installed.
Note: On the Target device, User needs to be logged in as an Administrator for the enrollment to go through properly.- Once the file is available on the target Windows device, double click on the file.

- Next you’ll see the below pop-up window, Click on ‘More Info’ and then ‘Run Anyway’.

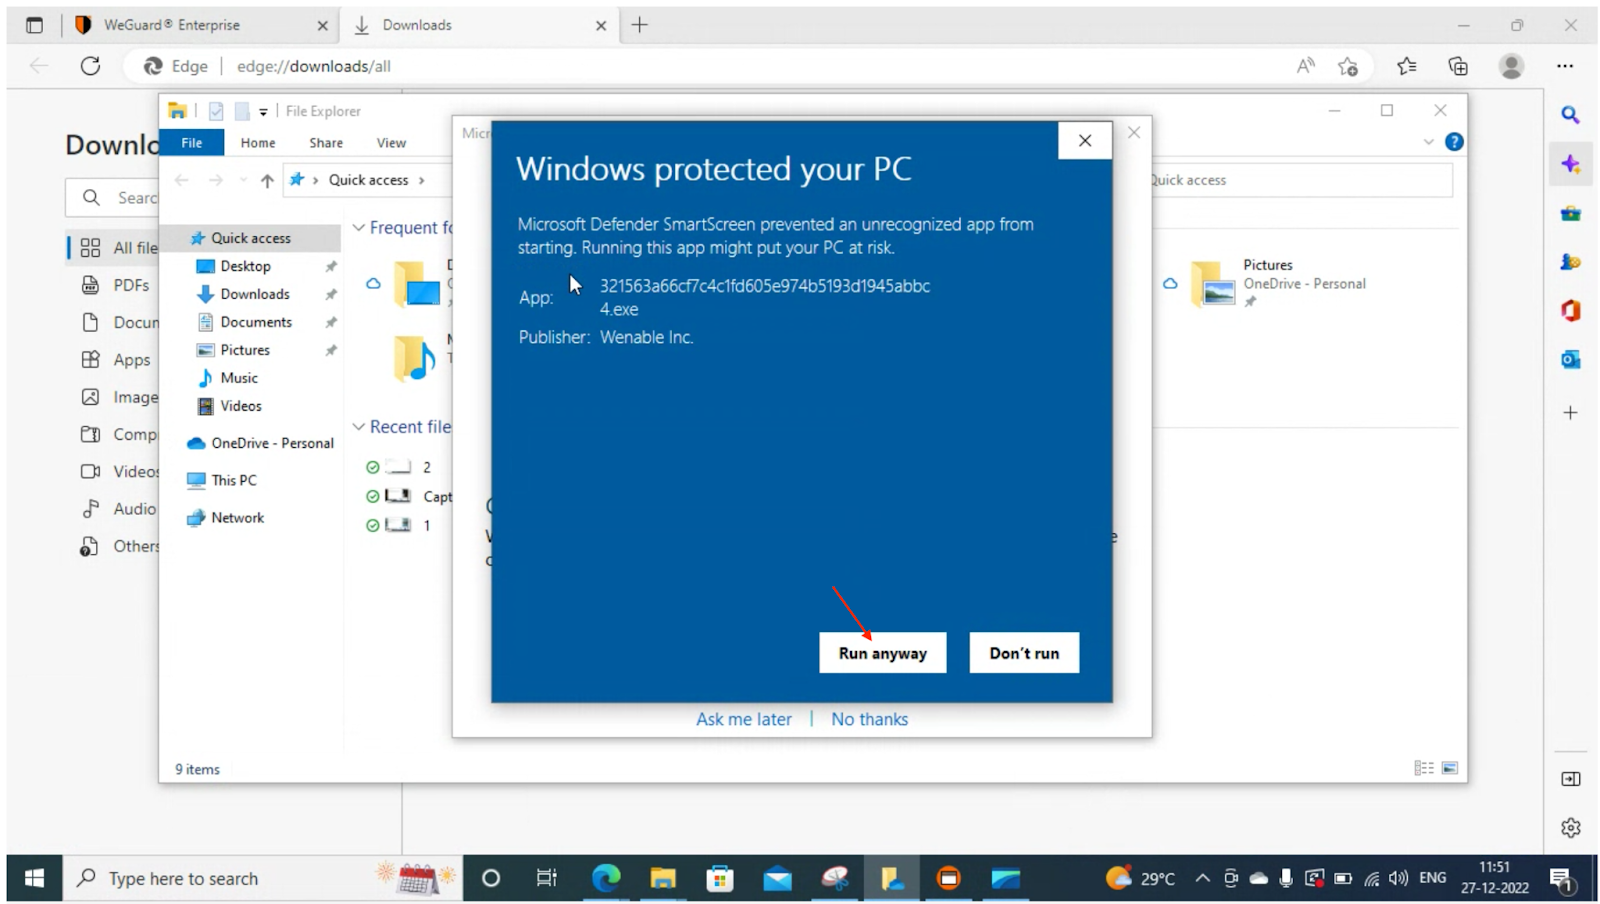
- Next you’ll see a command prompt pop up for a few seconds and then disappears.
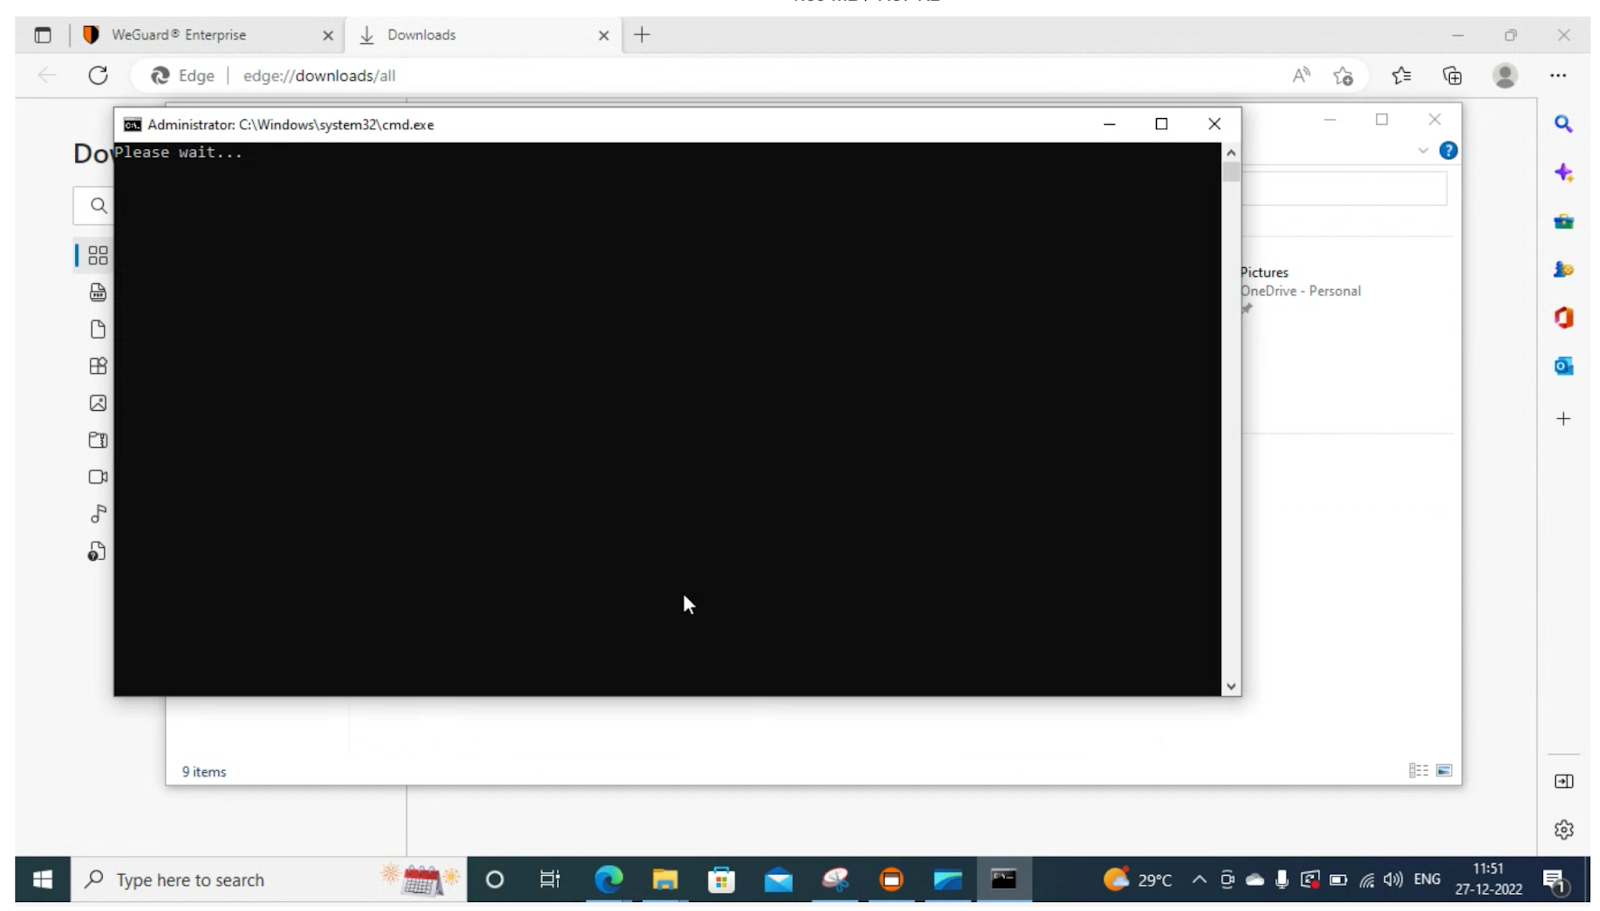
- Congratulations! WeGuard has been installed on the windows device and it’s registered on the console.
- To confirm if WeGuard is available on your windows system, Please navigate to Settings --> Accounts --> Access work or school. On that page, You'll find a tab saying 'Connected to WeGuard MDM'. Please refer to the picture below.
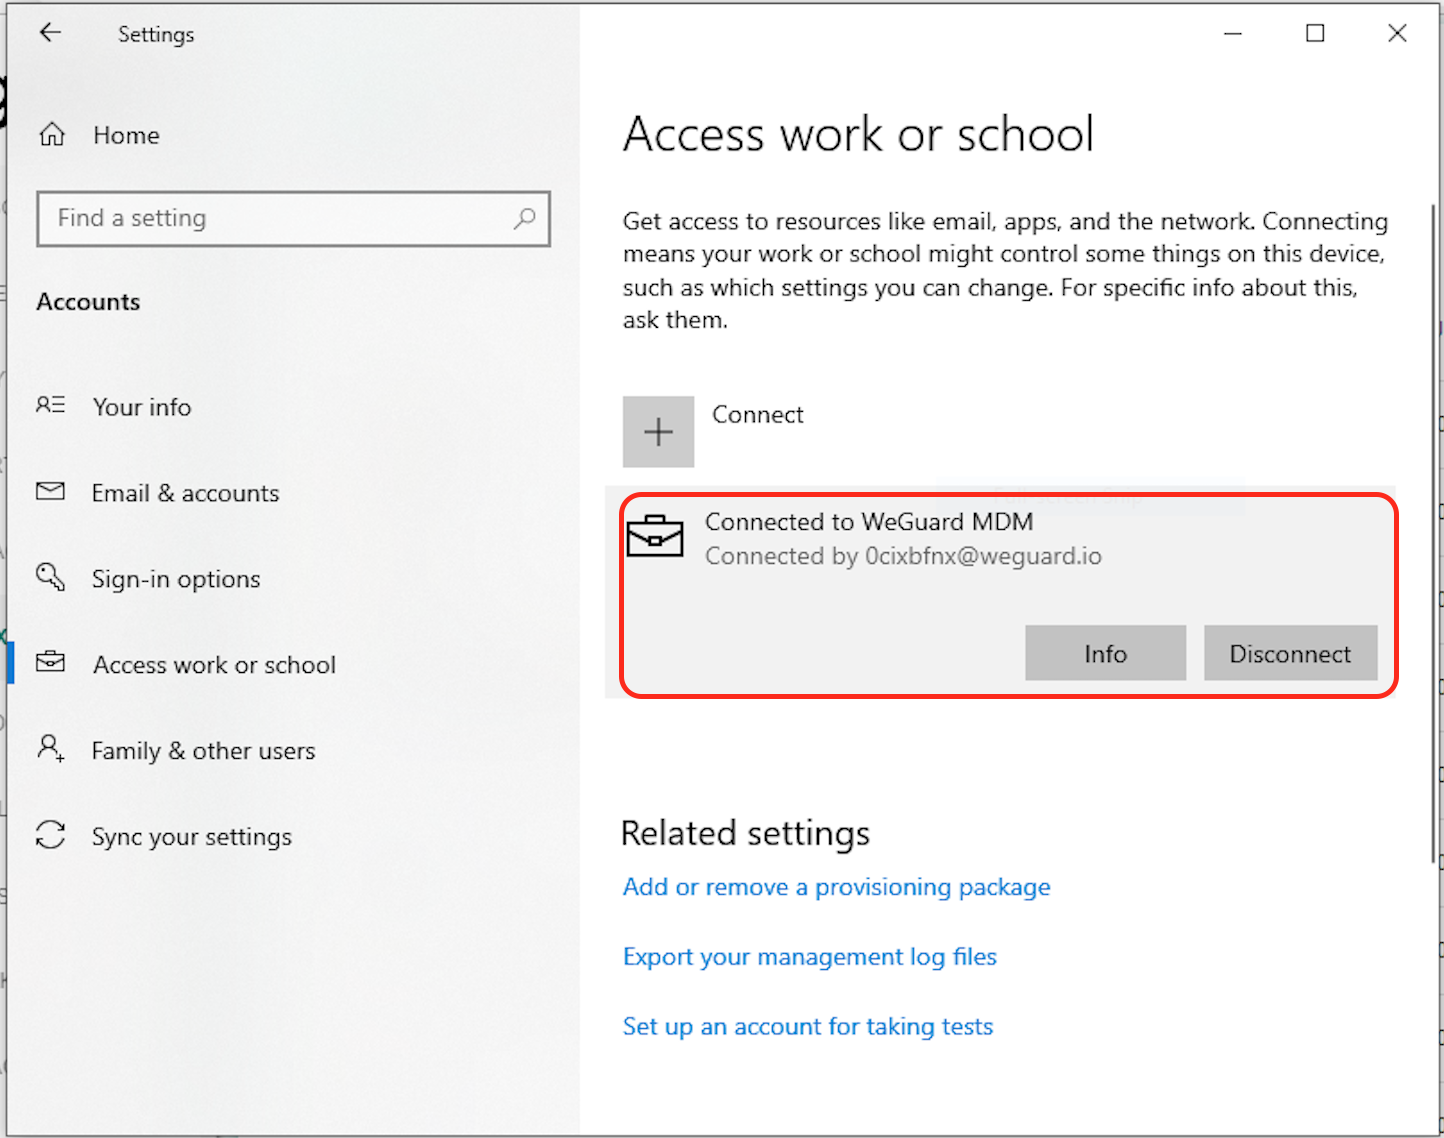
We hope this article was useful. Thank you for reading.
For more WeGuard insights, please explore the Visual Knowledge-base Series
For more details, please do visit https://www.weguard.com
If you need any help on this, do call up WeGuard Support +1 833-936-2253 or contact WeGuard Support Email.