How to enroll a Windows device?
Code-based enrollment
Bulk enrollment
 Note: WeGuard supports Windows 10 & higher laptops & desktops (IoT devices) with Professional (Pro), Enterprise, Business, and Education editions.
This article explains the step-by-step procedure for both methods.
Code-based Enrollment (Also known as Federated Enrollment method) :
On the targeted device (laptop or desktop), log in as device administrator and open MS Edge browser.
Login to the WeGuard console.
On the top right corner, notice the setting icon (beside profile name), tap on it and go to "Settings."
On the account SETTINGS page, notice the "WINDOWS ENROLLMENT" tab and tap on it.
Click on the enrollment URL (a long URL)
You will be redirected to a new tab to set up Microsoft Account for Work or School. Click on Open.
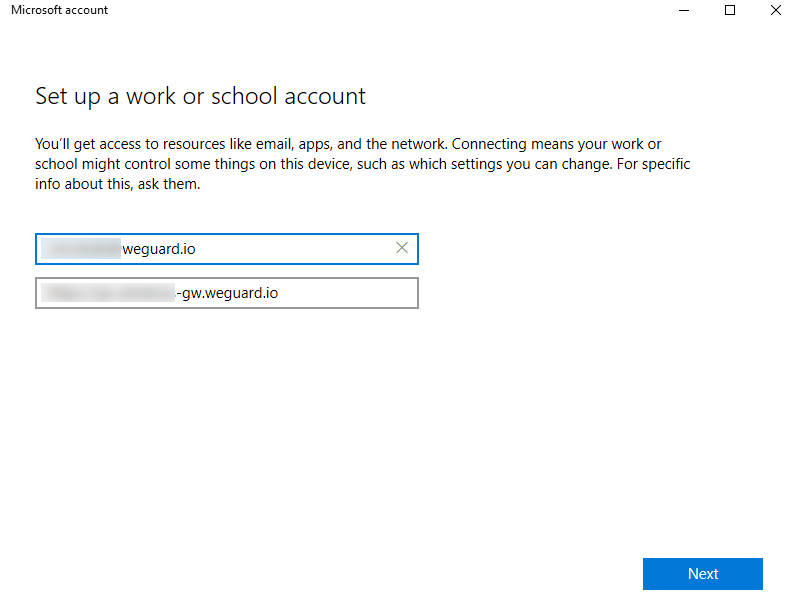
In the Work or School account setup page, Do not edit the email and URL. Click Next.
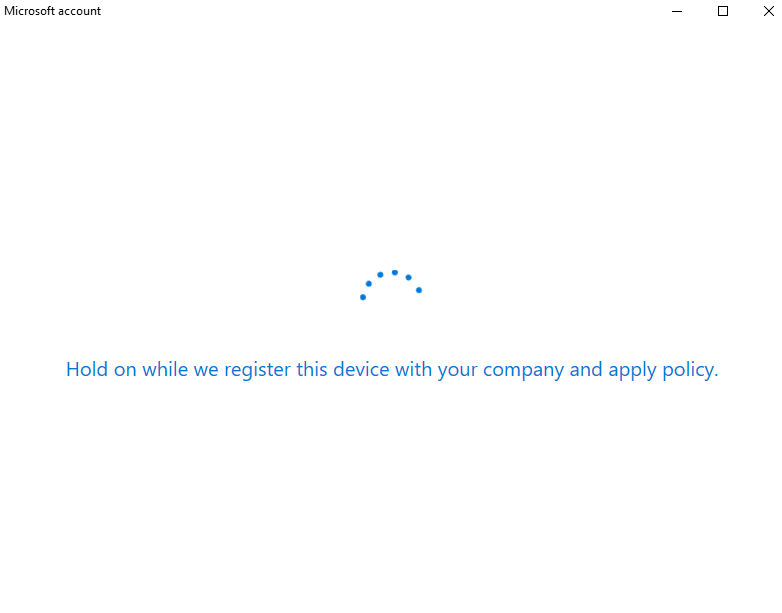
Wait for the enrollment completion.
Once the account is set up, the device will be enrolled with WeGuard®.

Notice the enrollment details on the device in Accounts > Access work or school.
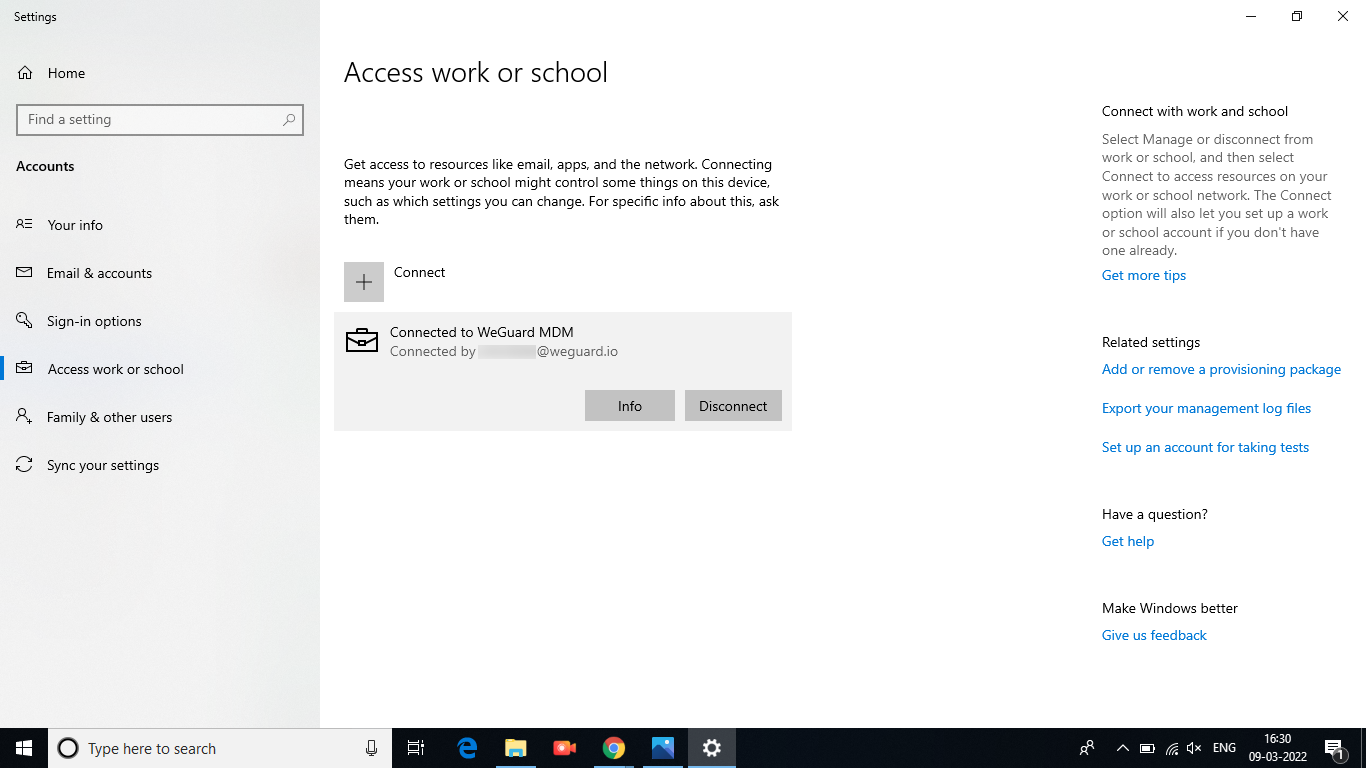
Right after enrollment, the device (laptop or desktop) will be associated with the "Default Windows" policy.
Zero Touch Enrollment (Also known as Certificated-based Enrollment method) :
Login to WeGuard console.
On the top right corner, notice the setting icon (beside profile name), tap on it and go to "Settings."
On the account SETTINGS page, notice the "WINDOWS ENROLLMENT" tab and tap on it.
On the enrollment page, notice the "Bulk Enrollment" section.

There are 3 enrollment procedures available, they being
PPKG
ZIP
EXE
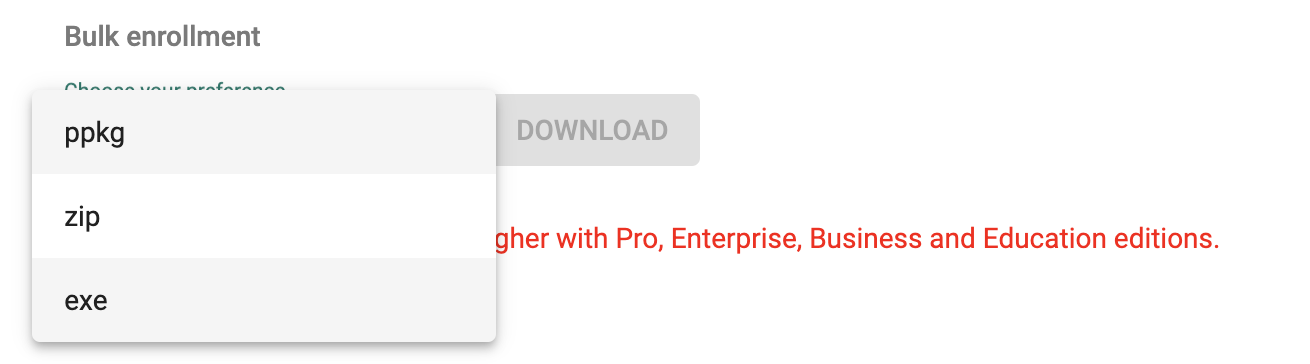
Based on the preference, select the format and click on Download.

Once the file is generated, it will download automatically.
Transfer the installation package to the targeted device and double click on the file.
The installation & enrollment process would run in the background. Once finished, the device will be automatically associated with the "Default Windows" policy.
To review enrollment information, go to Settings > Accounts > Access work or school.
On successful enrollment, the device will start showing up in the WeGuard console.
Henceforth, it can be fully controlled through policy configuration.
Related Articles
Device Enrollment - What to do when the device shouldn’t be included in zero-touch enrollment?
Hello and Welcome to WeGuard Knowledge-base Series. In this KB article, We will explain the steps to follow to ensure the device is excluded from zero touch enrollment. When your device is registered for zero-touch enrollment, it starts up and shows ...Device Enrollment - What happens when the devices are registered on zero-touch and Samsung Knox Mobile portal?
Hello and Welcome to WeGuard Enterprise Knowledge-base Series. In this KB article, We will explain what happens when the devices are registered in Google Zero-touch and Samsung Knox Mobile portal. If a device is registered and configured in both Knox ...Device Enrollment - What is Zero Touch Enrollment?
Hello and Welcome to WeGuard Knowledge-base Series. In this KB article, We will explain Zero Touch Enrollment. Zero-touch enrollment is a streamlined process for Android devices to be provisioned for enterprise management. On first boot, devices ...Device Enrollment Procedures - How to link Google Zero-Touch account to WeGuard console?
Hello and Welcome to WeGuard Enterprise Visual Knowledge-base Series. In this KB article, We will explain the procedure to link Google Zero-Touch account with WeGuard on WeGuard Enterprise Portal. Login to WeGuard console. Go to WeGuard Settings by ...Device Enrollment - Which IMEI to use to register Dual sim devices on zero touch portal?
Hello and Welcome to WeGuard Enterprise Knowledge-base Series. In this KB article, We will explain which IMEI to use to register Dual sim devices on zero touch portal. A dual-SIM device includes two modems and has two IMEI or MEID numbers. Use the ...